
Repairs, Parts & Pricing
Repair costs vary on the basis of parts availability, time taken to repair and the general condition of the machine including wear, mechanical damage, corrosion, etc. In many cases, video heads are no longer available for Beta machines, so their condition will determine if the machine is worth repairing. I have a video head tester to determine their condition. Second-hand heads are only used for repairs as a last resort.Beta VCR trade-ins and machines being thrown out
Even a machine which can't be repaired is worth keeping and trading in for the other good parts it might contain rather than throwing it into landfill. Often the electronics such as power supply fail yet the mechanicals like video heads which are no longer available still have plenty of life.I pay for some models of Beta VCRs for parts and repair or accept them as trade-ins against the price of a refurbished unit that you purchase from me. I no longer accept top load machines except the Sony SLO-1700 and a few smaller Sanyo VTC-5000 models as they now have too many issues with belts etc.
I prefer the SONY front load models which in the main do not require belt kits and I have the service manuals plus spares machines to use for parts to fix them.
I am especially interested in collecting models of SONY linear stereo and HiFi machines such as the SLO-1700, SL-HF950, SL-HF100, SLHF100P, SL-HF150, SL-HF77, SL-C9, SL-C40 and the SLO-420P.
For other Sony machines I collect see the pictures at Why bother with beta?
Parts and Quotes
Depending on what machines I have chosen to use as parts machines, most parts are available including whole boards if necessary. Quotes for repair are a minimum of $50 and will be allowed against the total cost should repair proceed. Should repair of the machine be un-economical, then trade-ins are accepted or counted against the cost of supplying a replacement machine. Otherwise the machine will be returned to you intact, not as a box full of bits.These prices were suggested in 2006 when the site was developed. Since then some of the older and larger machines may cost much more or be uneconomical to repair because of the price and/or lack of availability of replacements for the many belts used in them.
| Item | Service / Parts | Cost |
| SLC9 DC/DC problem | Changeover repair service | $100 |
| Repair load mechanism | Subject to part availability | $100 |
| Belt kits (all models) | Subject to parts availability | $80 |
| Sony SLC5 & SLC7 | Fix servo / tracking problem | $100 |
| Sony Power supply | Repair interference faults | $50 |
| Sony Power supply | Repair failed unit | $100 |
| Sony head drum motors | Second hand units. (rare) | $100 |
| Repair Beta IR remotes | If 'basically' complete | $40 |
| Spare parts / availability | Price on application | $????? |
For a demonstration on how to refurbish a capstan roller using a grinding wheel in a Dremel super tool (or similar) see the video on YouTube HOW TO REFURBISH A SONY BETA CAPSTAN ROLLER WITH A DREMEL.
This will work unless the rubber on the capstan roller has cracked or perished or the support bearings have failed.
Useful Test Jigs That I Have Developed
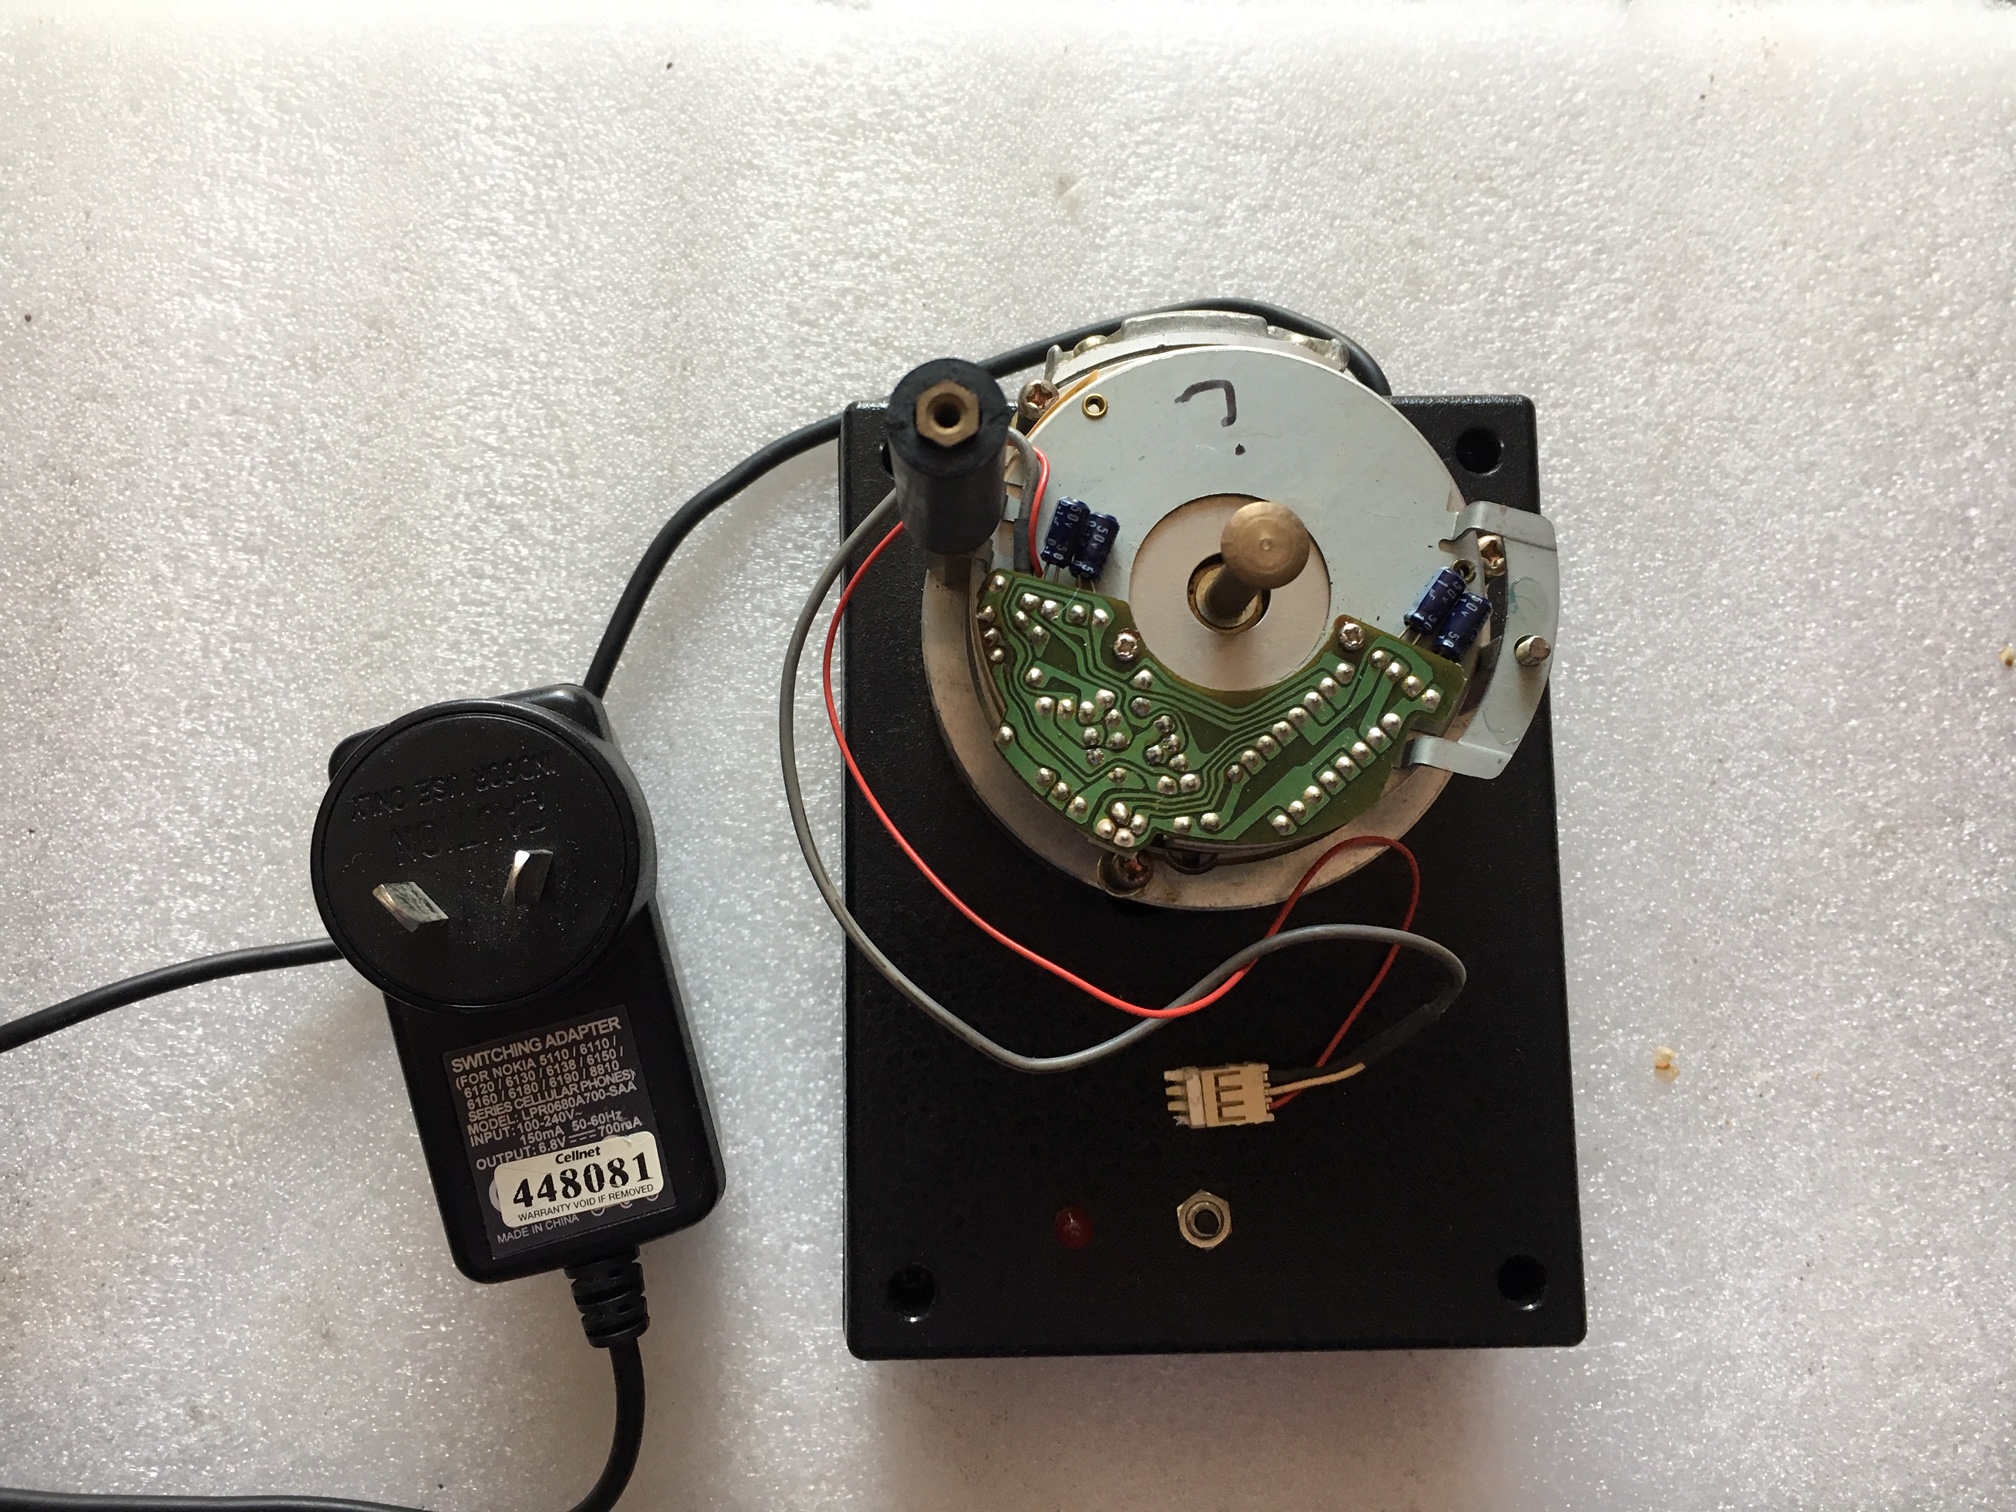
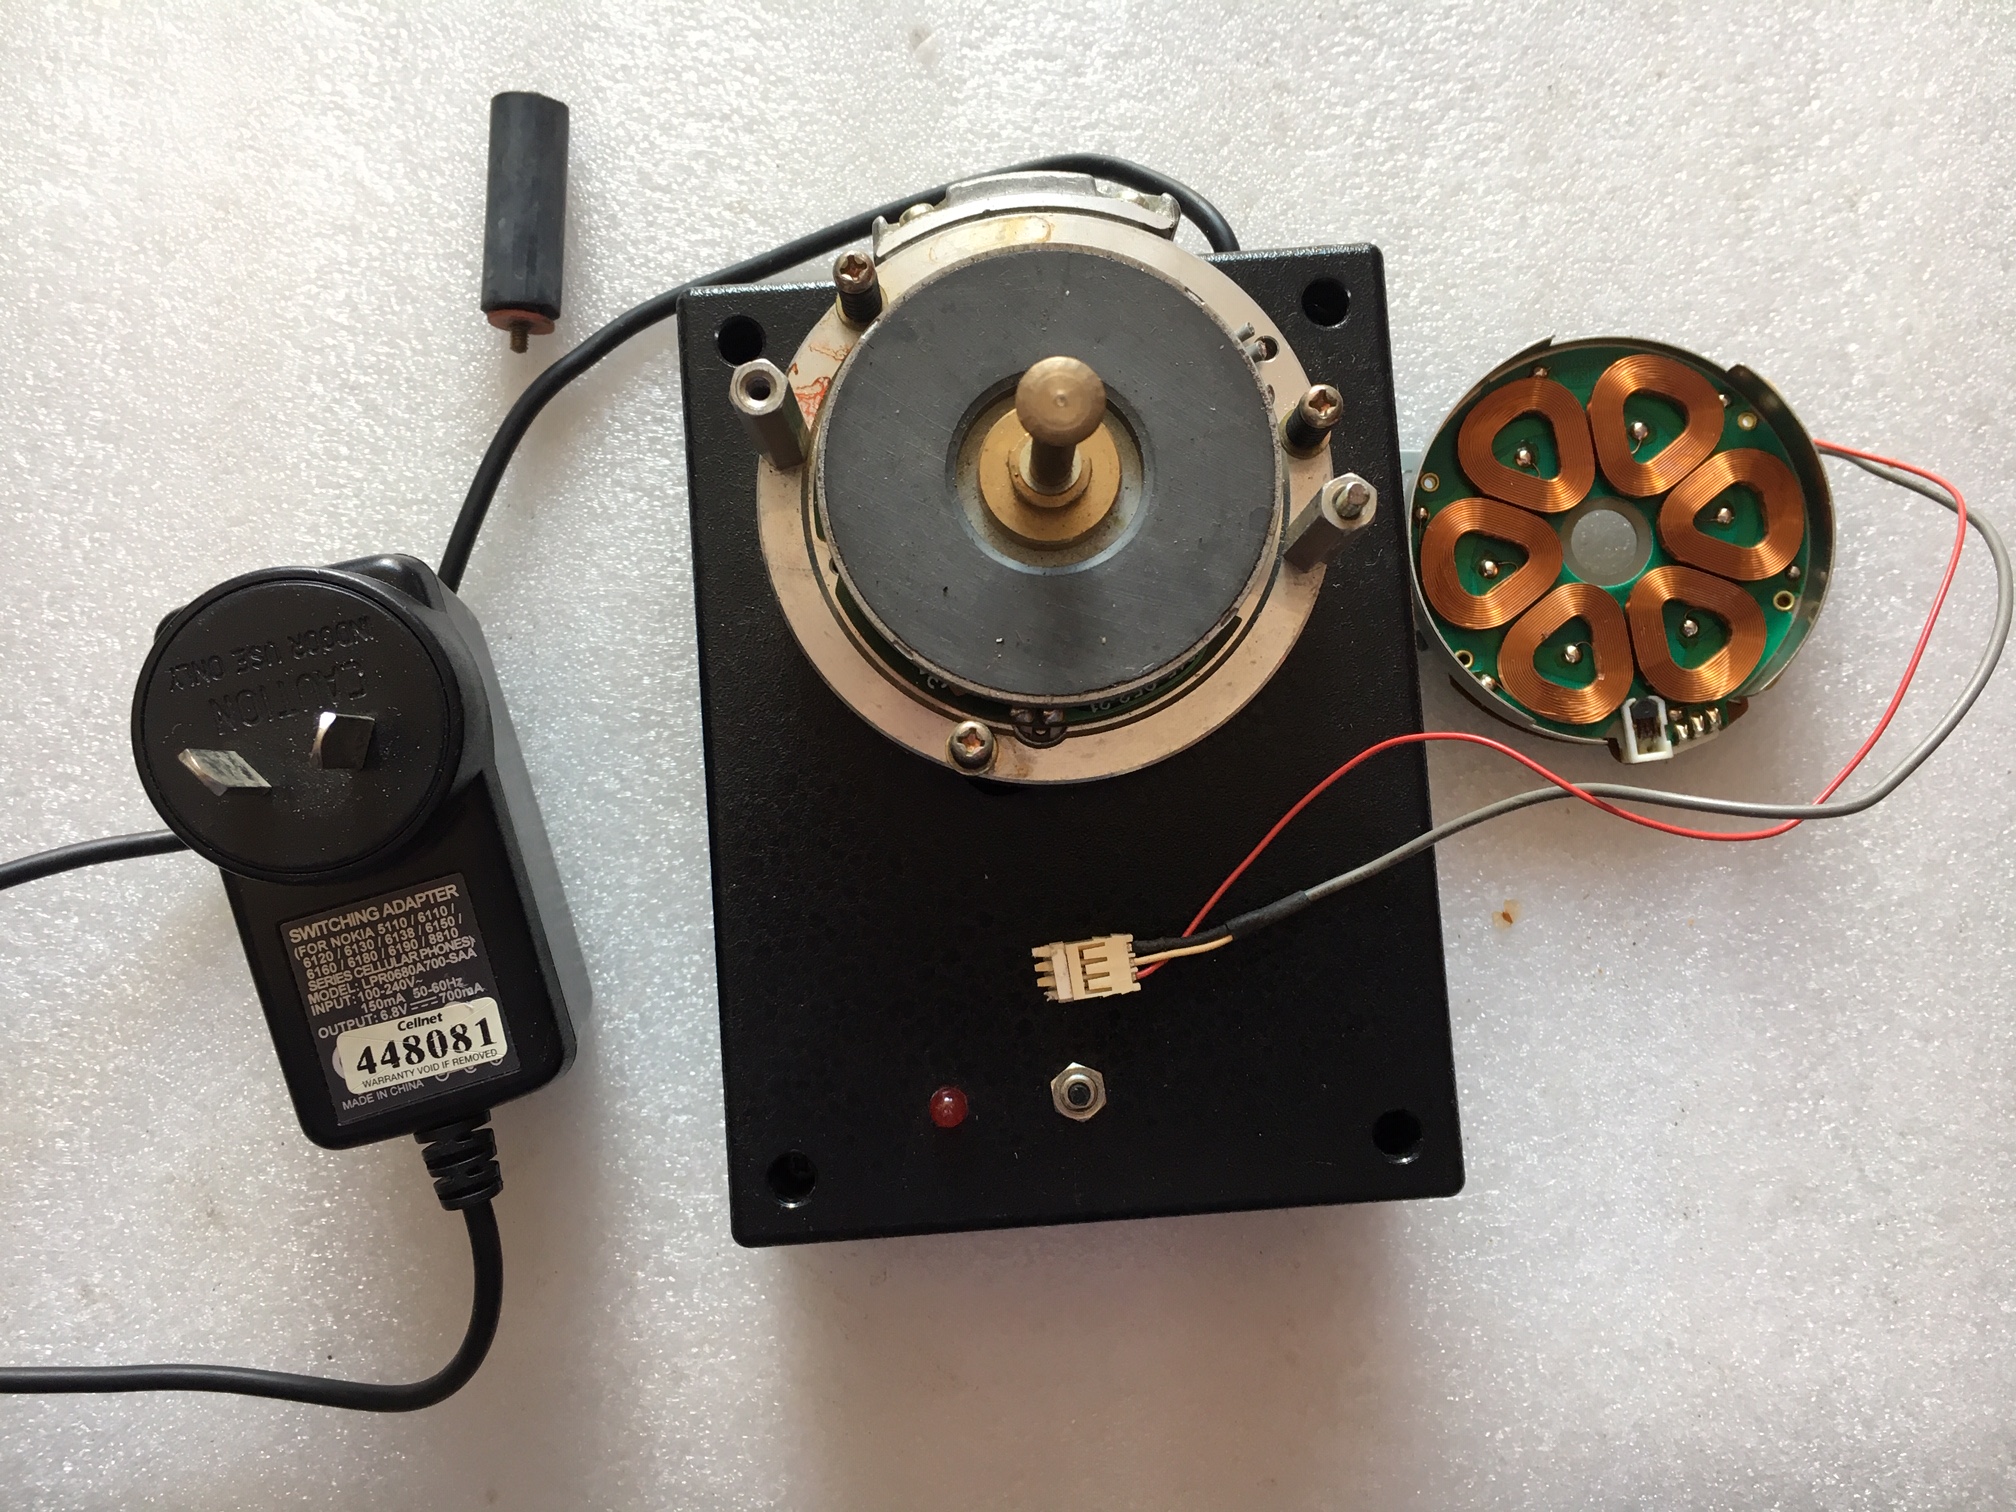
These are mainly for the Sony SL-C9 machine repairs :A. Sony beta head drum motor repair jig
(Click to enlarge)
(Click to enlarge)
Hence the functionality of the board can be tested outside of a machine. The most common failure is the hall effect sensor, see PALsite's Hall Effect Sensors page.
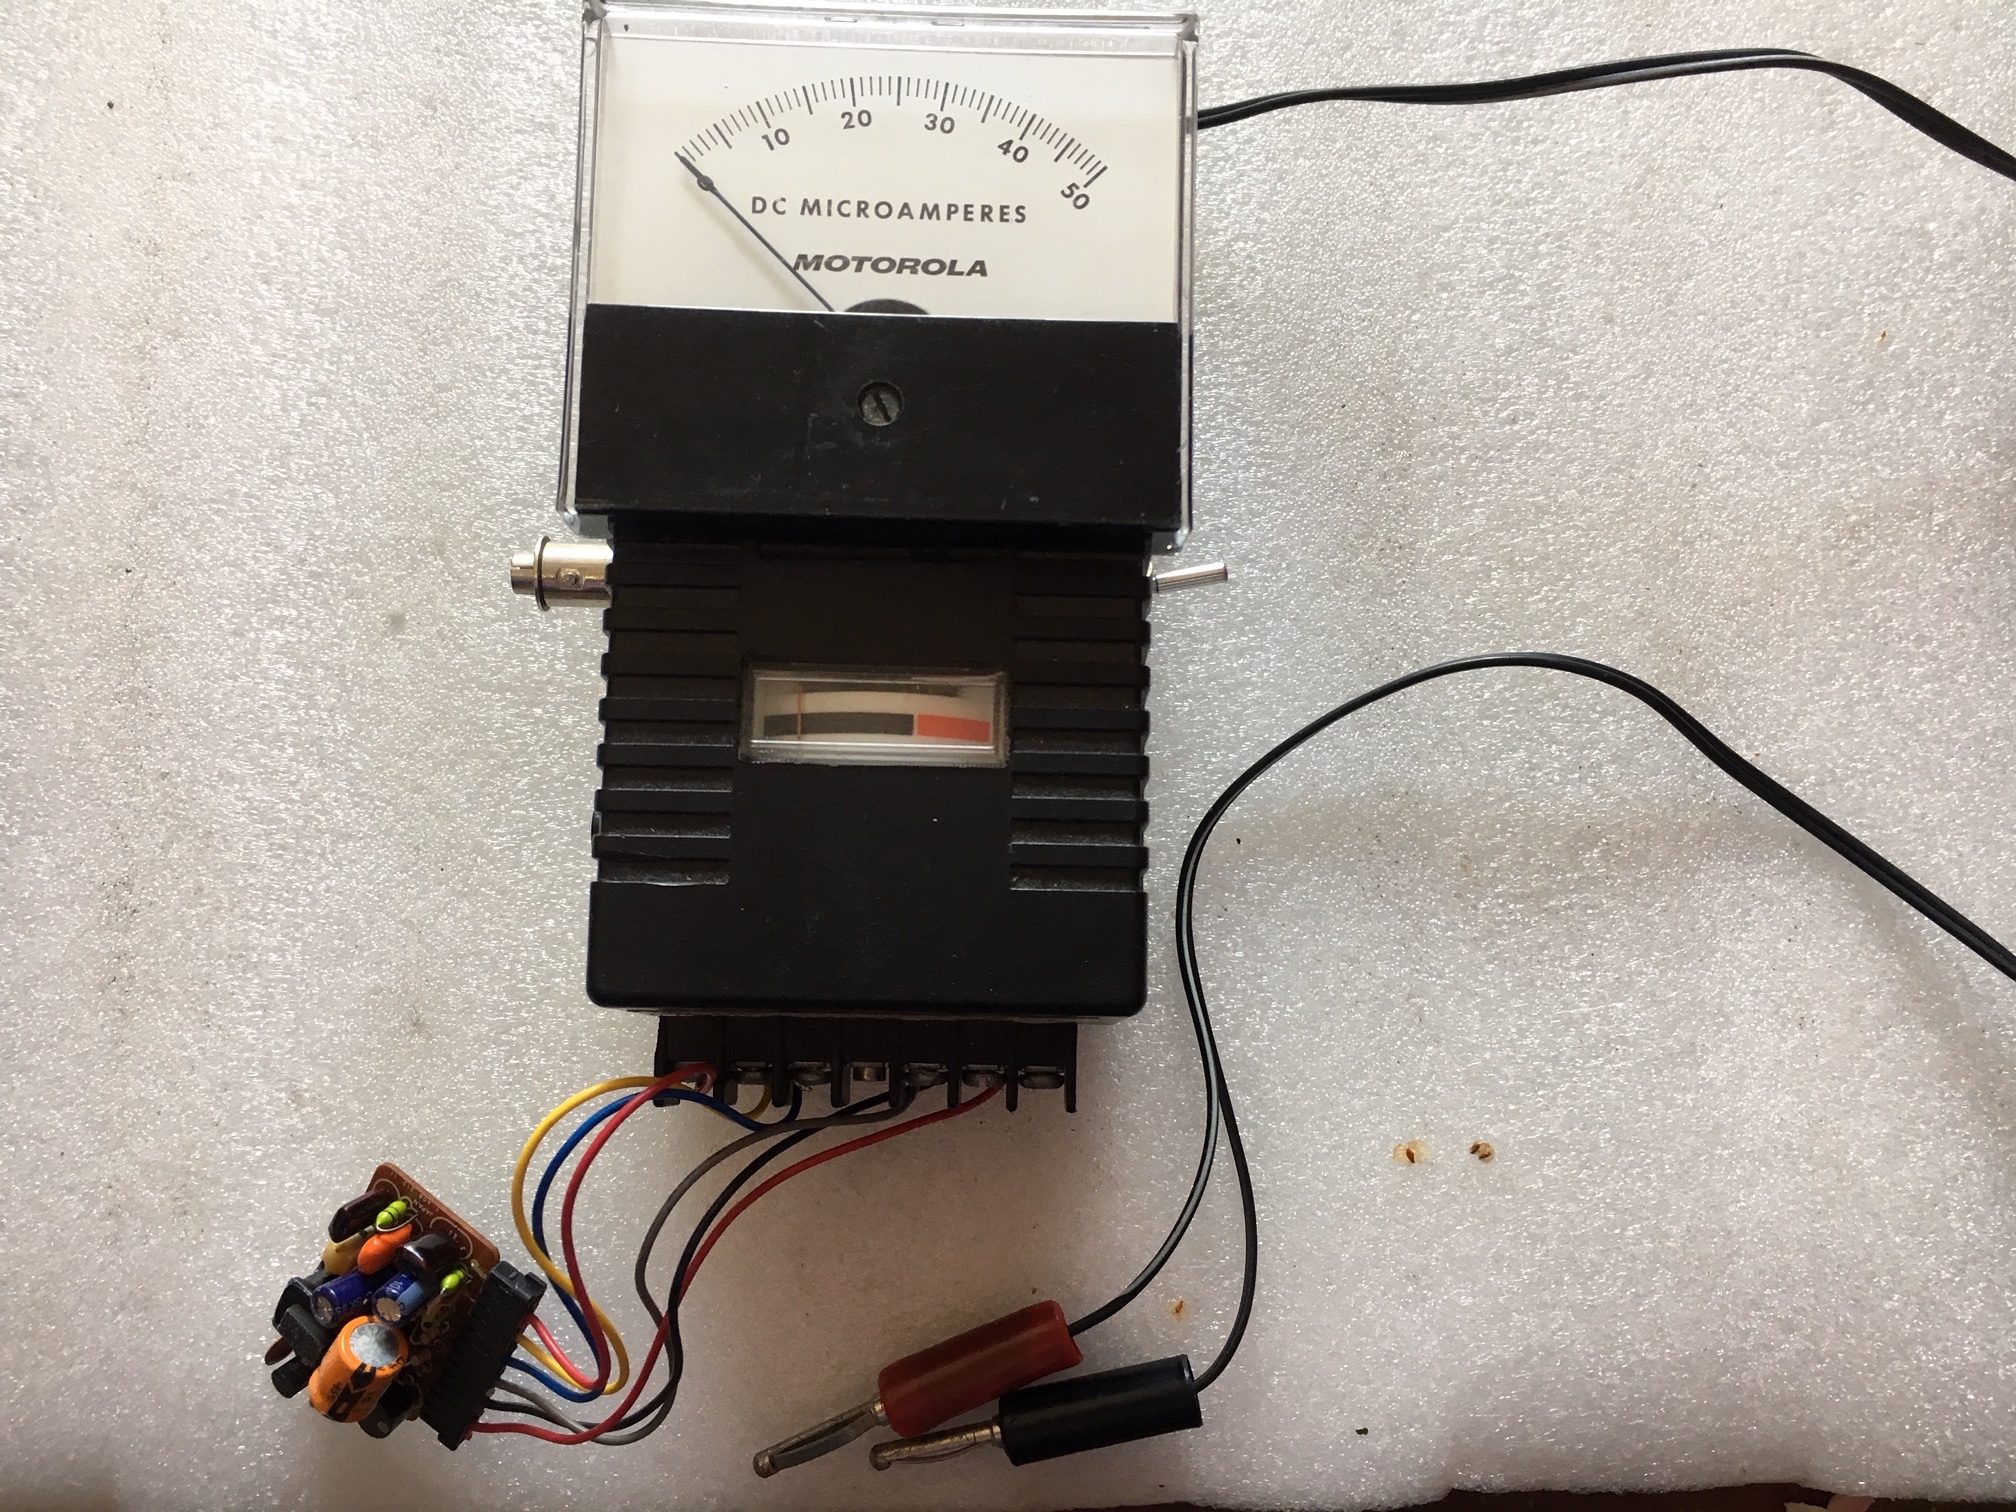
B. Sony power supply DC/DC convertor tester
(Click to enlarge)
- An indication of the current drawn by the unit.
- A BNC output to monitor the 3.3V AC waveform of the DC/DC used to power the gas display filament.
- The -38V rail (centre indication on second meter with toggle switch one way).
- The +28V rail (centre indication on second meter with toggle switch one way).
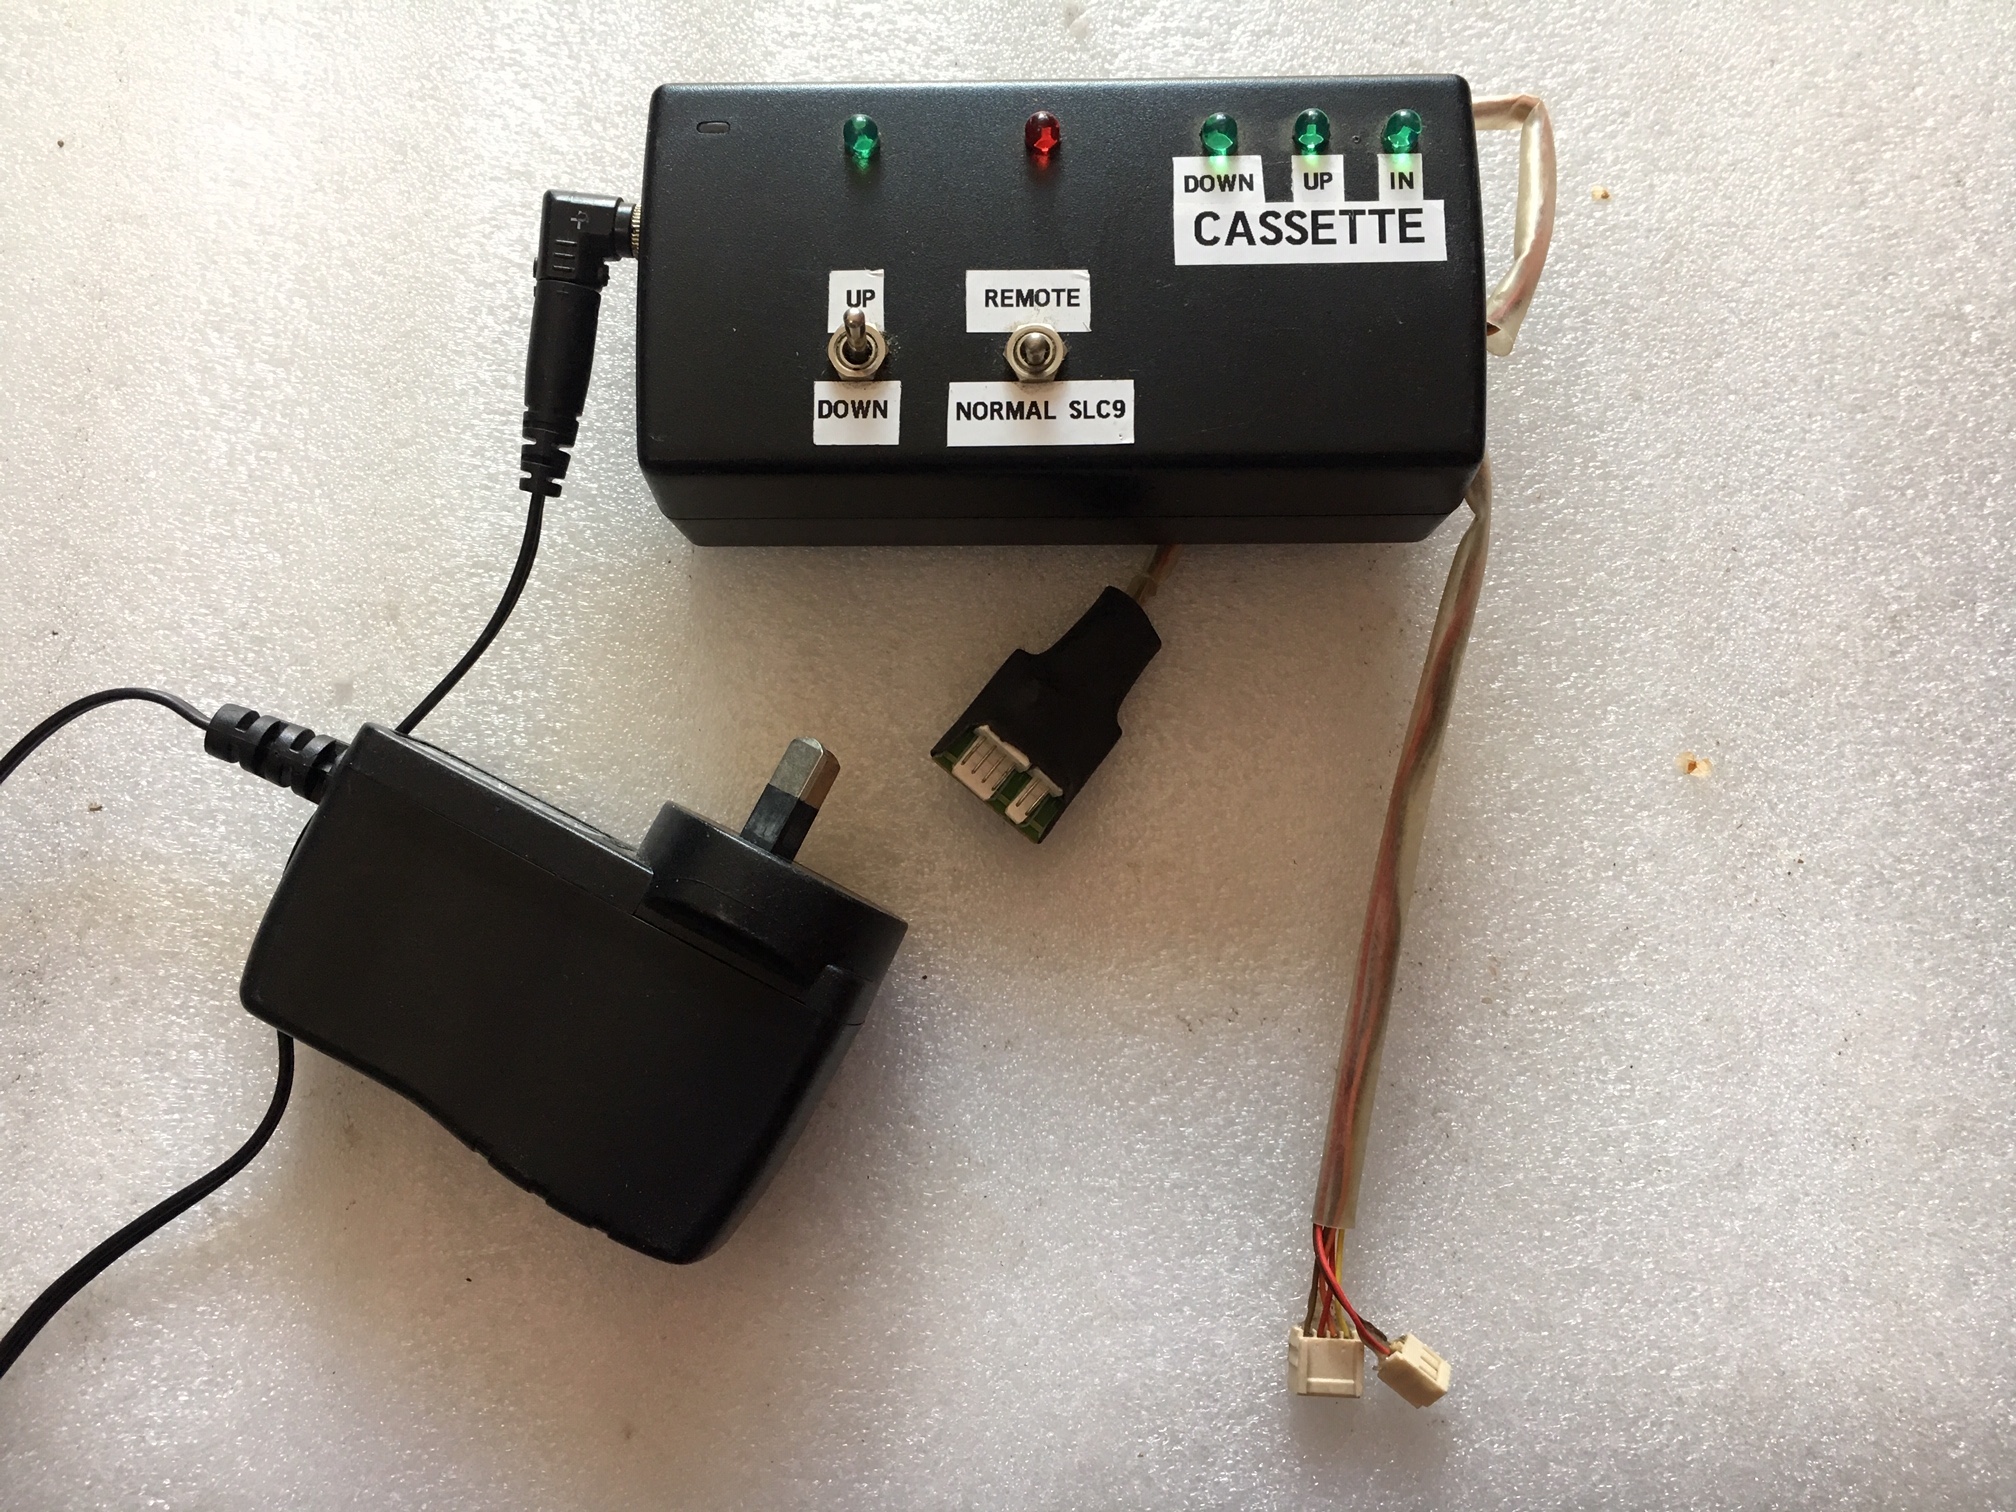
C. Sony SLC9 load mechanism electronic control interface
(Click to enlarge)
The SONY SLC9 has a microprocessor dedicated to the tape load mechanism. The gears on the mechanism can break plus there are guide alignment issues.
See PALsite's SL-C9 Technical Page half way down.
The drive circuits (transistor and diodes) can burn out when a tape jams in the mechanism for some time. Holes can even get burnt in the circuit board.
The inputs are, tape in, cassette up, cassette down. The output is tape motor drive down (loading) or up (unloading)
The interface control is driven by a 12V plug pack and has plugs and sockets which allow it to be placed in line with the SLC9s control to the carriage.
It can then be used to either monitor the machines "normal" operation and indicate switch and motor drive actions or be used in "remote" or slave mode, to control the load mechanism from outside the machine.
(It can also operate the carriage outside the machine if necessary during repairs.)